How I Plan Coordinated Family Beach Photo Outfits (Without Losing My Mind)
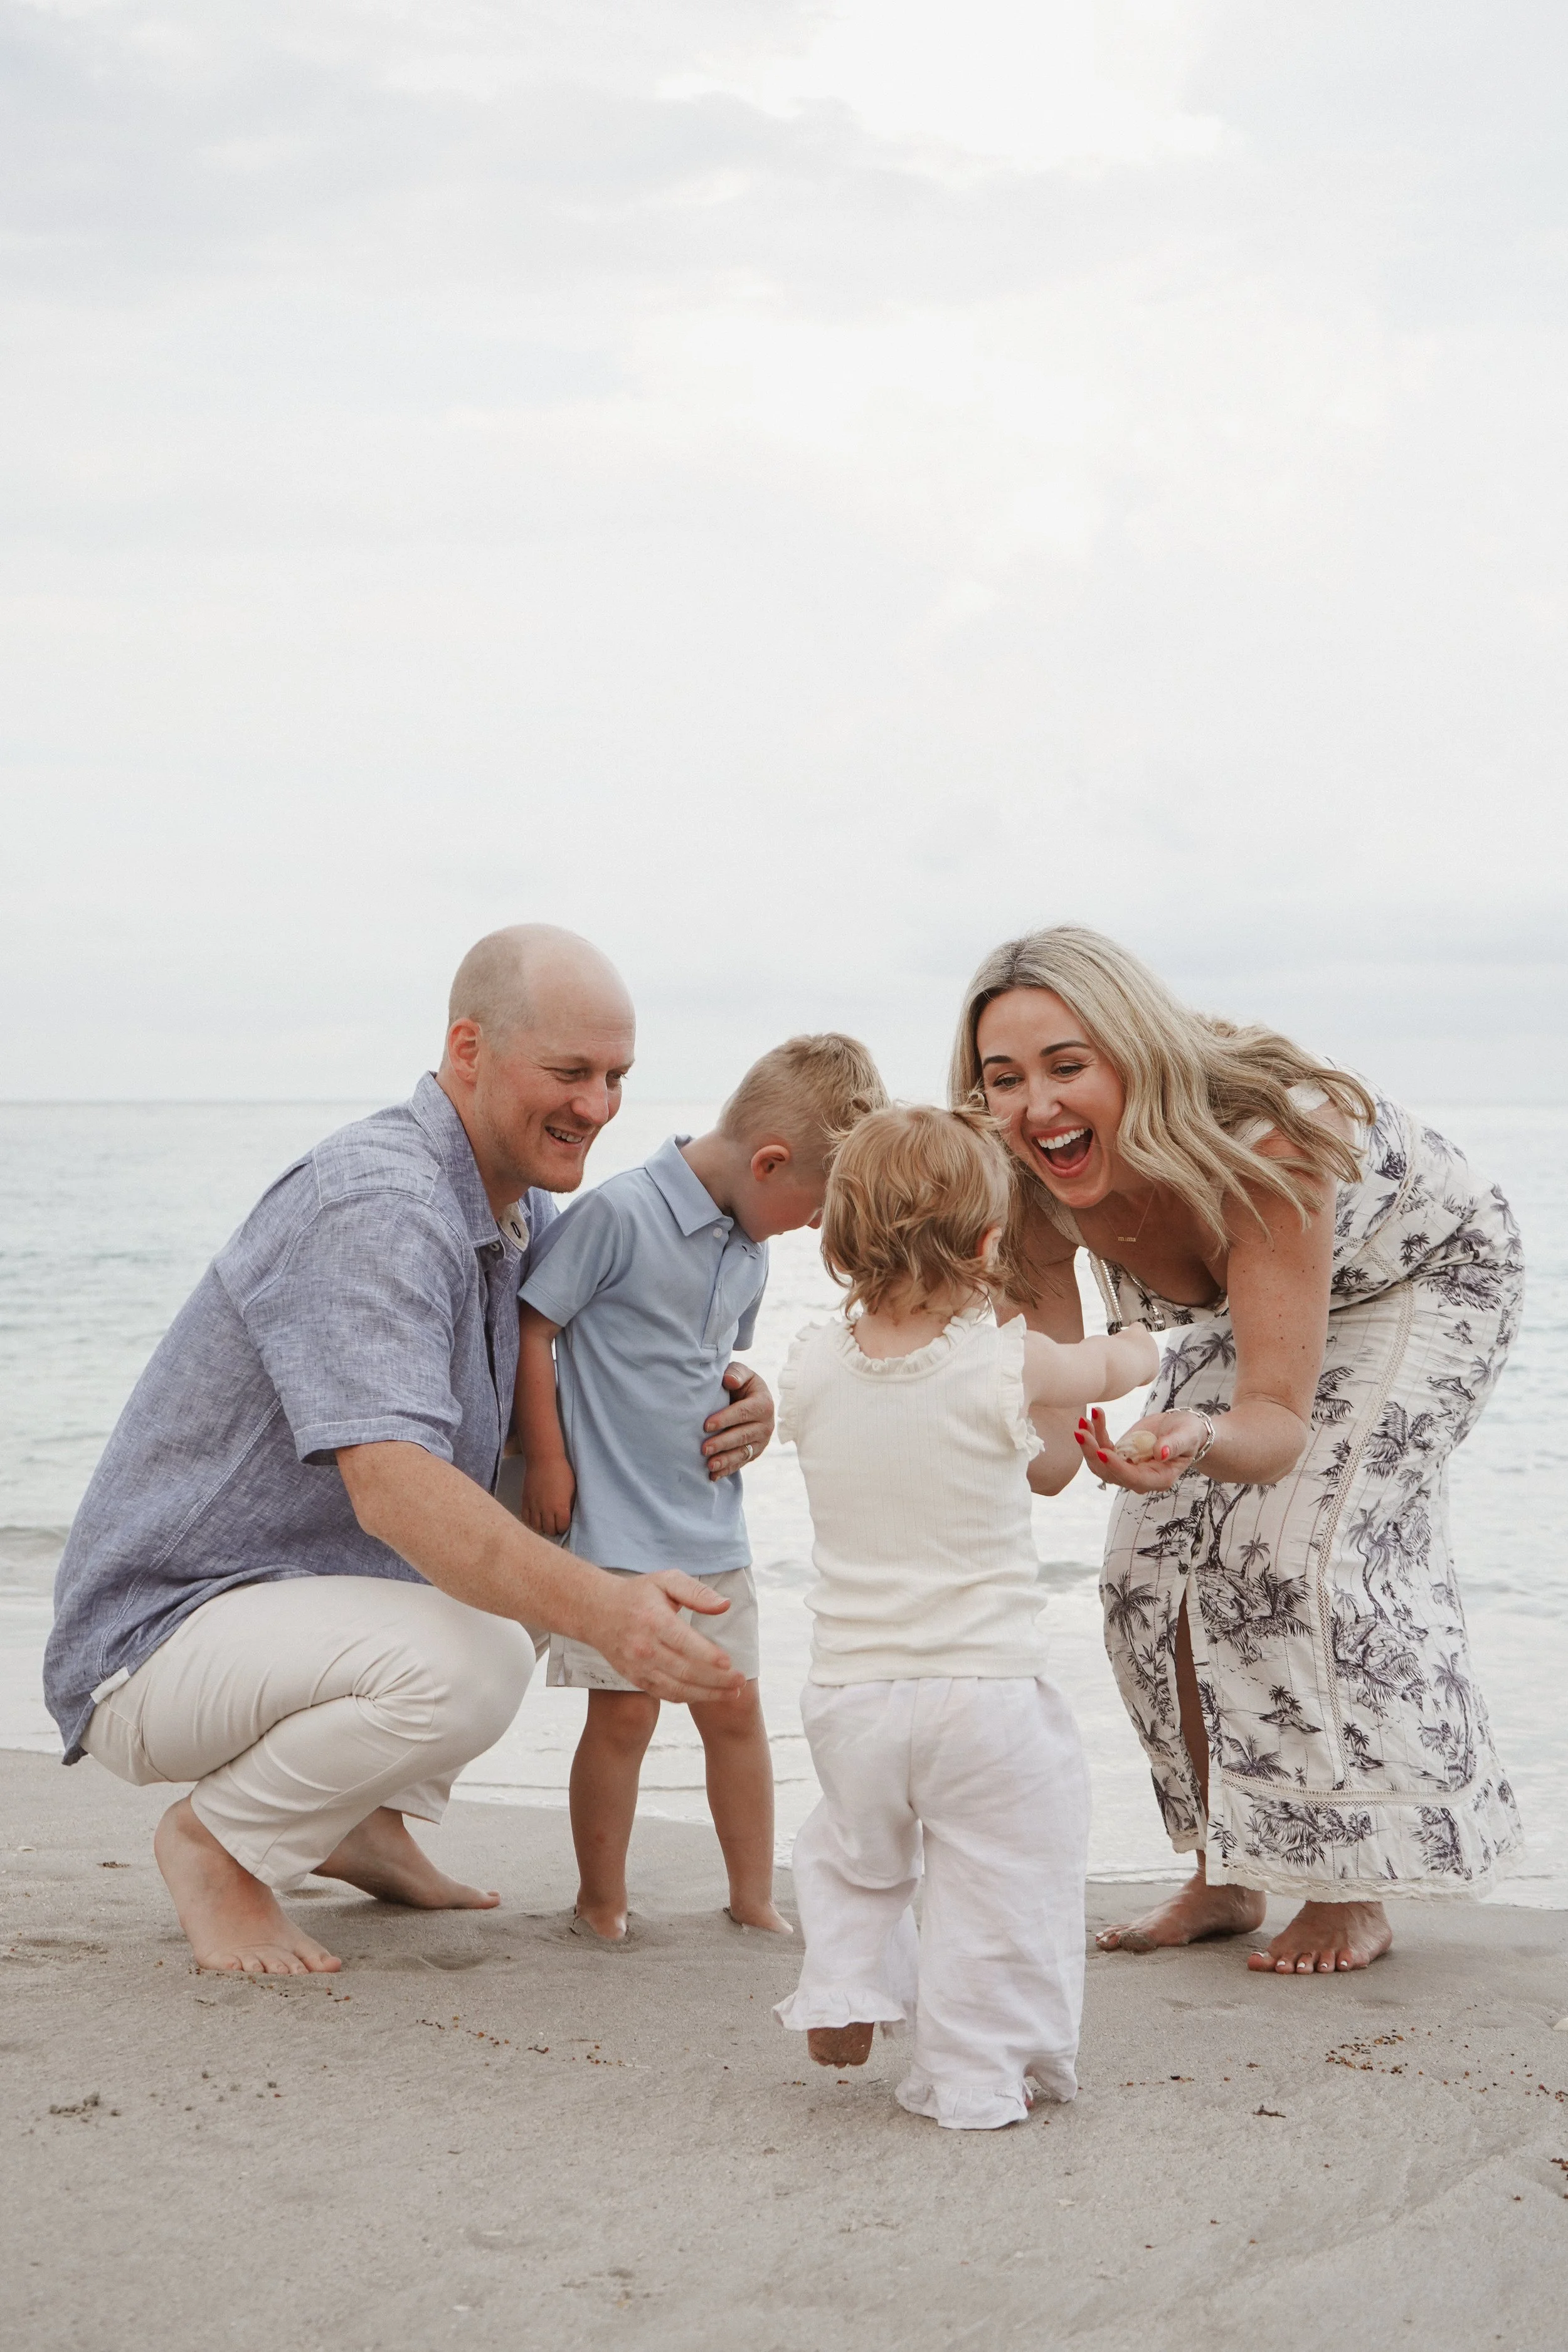
Every year around this time, my DMs fill up with the same question: "How do you get your family's outfits to look so put-together for photos?" So I'm finally sitting down to break down my exact process — the apps I use, the order I shop in, and the little tricks that make our beach photos feel effortless (even though there's definitely a method behind the madness).
If you've got a family photo session on the calendar, bookmark this one.
Step 1: I Always Pick My Outfit First
This might be the most controversial part of my process, but hear me out: I choose my own outfit before anyone else's.
Most people start with the kids or try to find "matching" pieces for everyone at once, but I've found it works so much better in reverse. My outfit sets the color palette, the formality level, and honestly the whole mood of the shoot. Once I know I'm wearing a flowy tropical-print maxi dress, for example, I instantly know my husband should be in something relaxed and neutral (not a stiff button-down) and the kids should stay soft and simple so they don't compete with the print.
Think of yourself as the anchor piece of the outfit flat-lay. Everyone else is styled around you, not the other way around.
Tip: If you're stuck on where to start, pick the piece you feel most confident and beautiful in. Confidence photographs better than any color palette ever will.
Step 2: My Not-So-Secret Weapon… Rent the Runway
Here's a tip that changed the game for our family photos: I rent my dress instead of buying it.
For this shoot, I wore the Zadig & Voltaire Renaid Cotton Tropical Island Maxi Dress through Rent the Runway — a $545 dress that I rented for $19. A few reasons I love doing this for photo sessions specifically:
You can wear designer pieces you'd never justify buying for a single afternoon on the sand.
No pressure to "get your cost per wear" out of it . You wear it once, you look incredible, you send it back.
Sizing flexibility. You can order a backup size for peace of mind, which is huge when you're trying on outfits with a toddler on your hip and zero time to return to the store.
It keeps our closet (and budget) from being full of occasion pieces we'll wear once and never again.
If you've never rented for a photo session before, I highly recommend it, especially for Mom's outfit, since it tends to be the most "special occasion" piece of the whole look.
Step 3: I Build the Whole Outfit Board in Canva
Once I have my piece picked out, I open a blank Canva board and start pulling in product photos as I shop — literally screenshotting listings from different sites and dragging them into one canvas. This is the step people are always surprised I do, but it's the difference between outfits that photograph as a cohesive family versus four people who happen to be standing next to each other.
Here's how I use it, step by step:
Start with your anchor piece (see Step 1) at the top or center of the board.
Screenshot everything as you shop, even if you're not sure yet. Drop it on the canvas. You're building a visual shopping cart across multiple stores.
Group by person, left to right or top to bottom, so you can see everyone's silhouette next to each other at a glance.
Zoom out and squint. This sounds silly, but it's the fastest way to catch a piece that's "off" — a pattern that's too busy, a color that's too saturated, or a shoe that doesn't belong.
Check for color repetition. I like at least one color (usually cream, white, or a soft blue) to show up in every single outfit, even if it's just an accent. It's what makes everyone feel like they belong to the same "family" visually.
Leave it open while you shop. I'll revisit the board over several days as new pieces catch my eye, swapping things in and out until it feels balanced.
Tip: Save your finished board as a template! I now have a "beach neutrals" and a "fall family photos" board saved in Canva that I duplicate and tweak every season instead of starting from scratch.
Step 4: I Style Around the Scenery, Not Just Each Other
This is the piece that I think gets skipped the most: your outfits shouldn't just match each other — they should match the setting.
For a soft, overcast beach with pale sand and muted water like ours, I intentionally leaned into a quiet, tonal palette: creams, soft blues, tans, and warm whites. Nothing neon, nothing with a bold graphic print (aside from my dress, which reads more like a watercolor than a loud pattern), because I wanted us to feel like part of the landscape rather than competing with it.
A few things I always consider:
Overcast or soft light? Stick to soft, muted tones. Bright colors can look harsh or overpower the dreamy quality of that light.
Bright, sunny beach day? You can push warmer or more saturated tones, like terracotta, butter yellow, or deeper navy, since the light will balance it out.
Green, lush backdrop (forest, garden)? Creams, whites, and warm neutrals will pop beautifully against all that green. Avoid another green or you'll blend in.
Urban or city backdrop? This is where you can actually get away with a bit more pattern or a statement color, since the background is busier and can hold its own against it.
Basically: ask what the background is doing before you decide what everyone's wearing.
Shop This Exact Look
Here's everything from our shoot, in case you want to recreate it:
Mom: Zadig & Voltaire Tropical Maxi Dress — rent from $19 (retail $545) via Rent the Runway
Dad: Linen Camp Shirt — $65–$130 + EasyFive Slim-Straight Pant — $148
Daughter: Ruffle Rib Tank in Cream — $32 + Wide Leg Linen Pull-On Pant — $32
Son: Short Sleeve Polo in Light Blue — $44
Full shoppable links are on my Linktree! —> https://linktr.ee/aestheticmomedit
Quick Recap: My Family Photo Outfit Checklist
[ ] Pick Mom's (or your own) outfit first — it sets the whole palette
[ ] Consider renting a special piece instead of buying
[ ] Build a Canva board and screenshot pieces as you shop
[ ] Group outfits by person and zoom out to check balance
[ ] Repeat at least one color across every outfit
[ ] Match your palette to the scenery and lighting, not just each other
[ ] Give yourself a few days to swap pieces in and out before committing
Family photo outfits don't have to mean matching head to toe, they just need a little intention behind them. Start with the one piece that makes you feel like you, build everything else around it, and let the location do some of the styling work for you.
Save this post for your next shoot! 🤍
xox - The Aesthetic Mom, Ari
